Pitas Recipe
Pitas are the simplest form of bread. Pitas are the Eastern Mediterranean equivalent of French bread. They are good with everything. Pitas are good by themselves, served with a spread like hummus or baba ghannouj. With a little extra oil, they are perfect for sandwiches. They are very easy to make, but there is a learning curve. Especially when learning when the dough is properly proofed. When pitas are properly proofed, the dough is malleable and easy to work with and will retain the shape you stretch it out to. When improperly proofed, they will be difficult to work with. The other important part of making pitas is to make sure that you kneed the dough properly to develop nice long gluten proteins. Otherwise, they will not poof correctly and will be difficult to stretch. Tasting Guidelines: Taste is sweet and savory with yeasty undertones. Weight is medium. Texture is soft. Good for people with low to moderate treatment side effects. Best categorized as Eastern Mediterranean.
Servings: 4 people
Cost: $5
Equipment
- Large mixing bowl
- dough mixer
- pizza stone
- rolling pin
Ingredients
Food Ingredients:
- 3 c. flour plus some extra for rolling out
- 2 tbsp. olive oil or cooking oil is fine
- 1-2 c. warm but not hot
- 1 packet yeast
- 2 tbsp. sugar
- 1 tsp. kosher salt
Instructions
- Activate your yeast as directed on yeast packet. Next, in a large mixing bowl, combine all ingredients except the water. Mix. Add water as necessary until you make a proper bread dough ball. After dough ball is formed, knead about 10 minutes or until bread develops some nice gluten. The dough will start soft, then get firm, then get extremely soft again. At this point, you know that you have kneaded enough. This is when a kitchen mixer is fantastic with a dough hook. Dough should look and feel like bread dough. Not too sticky, not too dry.
- If it's too sticky, mix in more flour. If too dry, add more water. Allow to rise in a warm, humid area covered with a moist towel or paper towel to keep it wet or keep it from drying out for at least 3 hours. The longer it rises, the better of a flavor it will develop. But 24 hours is probably way too long. Remove dough from bowl. Cut into balls 2–3 inches in diameter. Should make about Allow to rest about an hour.
- At this time, take a pizza stone and put it in your oven. Heat as hot as it will go without burning down the house. Heat to at least, 425°If you do not have a pizza stone, you should go out and get one. They are about fifteen dollars, and you can even order them off the Internet. Take a baking sheet or an upside down pan and use that instead. The idea here is to have a flat, hot surface to shock the dough into cooking.
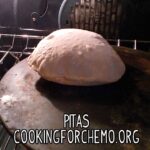
- Roll out one ball of dough. You want it thin, but not paper thin. Paper thin will burn, and if it's too thick it will cook more like a naan bread. The idea here is to get it somewhere between 1–2 millimeters in thickness. If the dough will not stay rolled out in length and begins to contract, roll the dough back into a ball and allow to process longer. Assuming your dough is happy and healthy, what we want to do is throw each pita onto the stone or pan and allow it to cook until it makes a poof, or a pita pocket.
- If you did everything correct, this will happen, and you will have a nice light brown pita with a perfect pocket. If you are like me and didn't do everything correctly down to the last detail, you will get some nice bubbles throughout the entirety of the dough and a very pliable pita perfect for making sandwiches.
- Depending on the temperature of your oven, this process should take about 2–4 minutes. Remember to allow your stone or pan to come back up to temperature in between making pitas. I like to roll them out one by one so I can be certain to hit the correct temperature in between.
Notes
With pitas, practice makes perfect. Do not get discouraged if they do not turn out perfectly the first time. This same recipe can be used to make fresh pizza dough! I simply increase the oil from 2 tbsp. to a 1/2 of a c. Increasing the oil makes the dough softer and spongier when cooked. It also helps maintain moisture after cooking. This recipe will yield two large pizzas. If you like really crispy pitas or pizza, remove the oil entirely. These pitas are perfect for making sandwiches or serving with dips and tapenades, like hummus or baba ganoush.